I purchased my Toshiba in April and by September (FIVE MONTHS LATER!) it was shutting down with increasing regularity: not a power down, but a complete, instant shut off. As this always happened during heavy processing loads and that lifting the machine off the desk with books (what moron designed a laptop with the fans UNDERNEATH the machine?!?) stopped the problem, it was obviously thermal in nature. A friend who owns the exact same laptop had the exact same problem and an online search revealed that this problem is common in new Toshibas. Between September and December, the problem got progressively worse to where playing a DVD for 20 minutes would prompt a shut down.
Apparently Toshiba had started using desktop processors to get more power in their notebooks, but because of the heat they put off, they had to design an air-flow cooling system. Fans drag air through heatsinks, but suck in dust, too, which becomes trapped in the heatsink, blocking airflow and resulting in the processors getting too hot and shutting down.
Toshiba's fix was a bios upgrade that, according to their website, "better regulates thermal management". This is bullshit. The problem isn't a software one, but a hardware one, but rather than recall the laptops, Toshiba put out a fix that essentially slows down the processor so that it doesn't overheat, but cutting performance. When this was pointed out to Toshiba, the company said that it only "looked like" the processors had slowed when bench tests showed they had.
I didn't want to use this fix because I do a lot of intensive video editing on my laptop. I don't want a slower machine.
So the only real solution was to have the heat sink cleaned. My Toshiba is still under warranty, but the best return time they could give me was "3-5 weeks"; unacceptable as I needed to take it back to Ukraine with me.
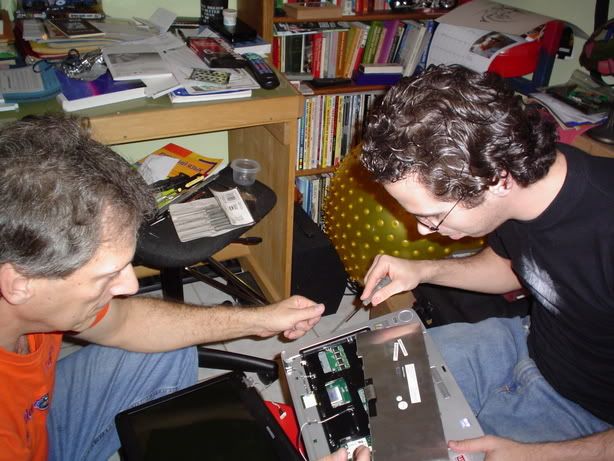
This left me with the option of cleaning it myself. I didn't think this would be overly hard: most laptops have an access panel for the CPU for upgrades. I was very, very wrong. As my mom's fiancee and I found out when we got down to it, the CPU is completely inaccesible without dissasembling the entire laptop. But we got it done and cleaned and now it's up and working great again (although I will be duct-taping dust filters over the vents to prevent the problem from reoccuring).
If you don't want to take apart your laptop, I suggest putting a vacuume up to the exhaust port and blowing air into the intake port. Not a complete fix, but it may help. On mine, as I found when we got it apart, it was so clogged with dust that this solution would not have worked for me.
If you want to perform the same operation yourself, here's the process:
1)Remove the battery and power supply and touch something grounded to remove static electricity from yourself. NEVER touch the motherboard, even if you've discharged the static electricity.
2) Remove all the screws from the bottom of the laptop. You will have to remove the access panel for the hard drive, remove the hard drive, and then remove the DVD drive to get to the last of the screws.
3) Turn the laptop back over. GENTLY lift up and remove the thin plastic panel above the keyboard. Use a flat-tip screw driver to do this. Unscrew the monitor. There are two screws on top and two going in the back of the laptop. Unplug the cable attaching it to the motherboard and unscrew the grounding screw. The information cables for the monitor are permanantly attached and, unfortunately, you'll have to work around them. Lay the monitor down and put a tee-shirt on top of it to keep it from getting scratched.
4) Unscrew the keyboard and gently lift it towards you. Pull out the ribbon cable that attaches it to the motherboard and set it aside.
Here you can see the monitor detached and the keyboard detached.
5) Through the access holes underneath the keyboard, unplug everything going into the motherboard. These cables are for LEDs and speakers.
6) Slide a flat-tip screwdriver around the edge of the laptop (between the black and grey plastic) to detach the upper housing from the lower. Flip the housing (the gray plastic) onto the monitor, taking care not to pull out the monitor info cable.

This is with the grey, upper housing removed, before removing the motherboard.
7)Now you can see the motherboard. The grey square in the upper right is the CPU, which the technicians at Toshiba have put underneath the motherboard, just to make things interesting for you. Reflect that you are now in the guts of your laptop and a simple access panel at the bottom of the laptop could have saved you all this risky grief.
8) Unscrew the screws on the motherboard and gently lift it out. You'll have to work it a bit as the USB, volume control and other bits stick out of access ports in the bottom housing, but if you take your time pulling back on the housing, the board will come out.
9) Turn the board over. There's the fans, the heatsink and the CPU. Remove the fans and the heatsink (the heatsink pulls up, but it may stick because of the heatsink compound on the CPU) and throughly clean them with canned air and/or cleaning solution.
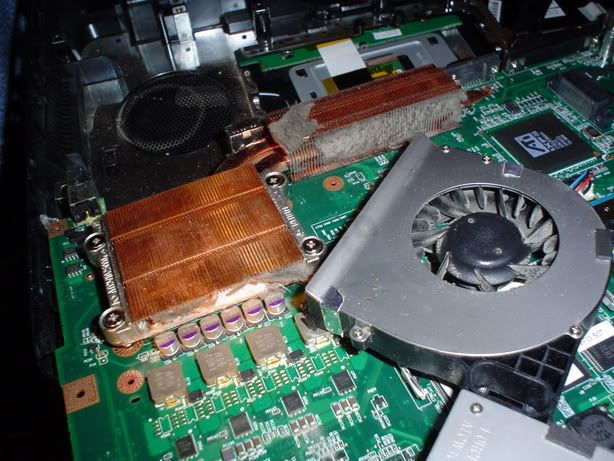
With the fans removed, you can see how much dust has built up in the heatsink. The airflow through the heatsink over the CPU (on the left) had been completely blocked with dust, which is what caused the overheating

Cleaned heatsink and fans
10)Put heatsink compound onto the CPU and reverse the process, making sure the right sized screws go into the right sized holes (the holes are marked F8, F5, F3, etc. for the size of screw. F8s are the biggest, F3s are the smallest).
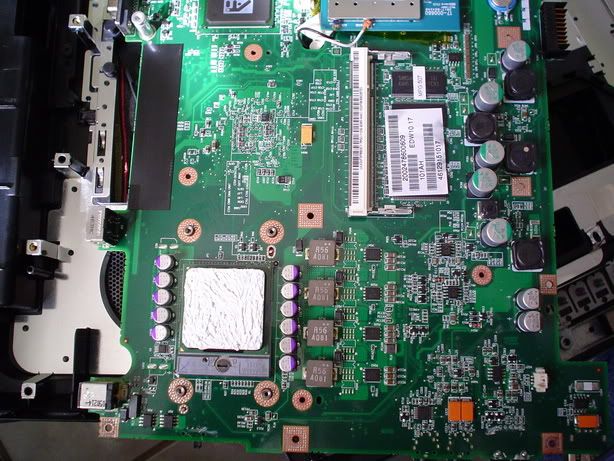
The CPU (lower left) with new heatsink compound on it
There. Simple.
Ironically, going through the laptop, I kept marvelling at the engineering. The packed a lot in onto one motherboard. Unfortunately, it was an oversight on the heart of it all: not allowing easy access to the one part that, in this laptop, obviously needs routine maintance, that made this such a process.
Good luck!